
RAC Installation Pre-Check: Step-by-Step Guide (Part 2)
This blog guides you through cloning a virtual machine, configuring it with a unique name, and ensuring it has unique MAC addresses. It also covers disk partitioning, attaching disks, and converting them to shareable for your Oracle RAC setup.
Cloning the Virtual Machine
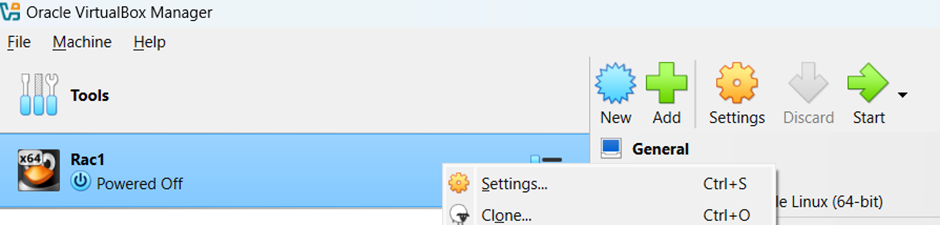
To clone the virtual machine, first ensure that it is shut down. Right-click on the VM and select Clone from the context menu. Follow the prompts to create a copy of your virtual machine.
Assign the name rac2 for the new virtual machine and select the appropriate Path where you want to store the clone. Choose Full as the Clone Type to ensure a complete copy of the VM is created and
Note (check the option to Generate new MAC addresses for all network adapters to prevent any potential conflicts with the original VM).
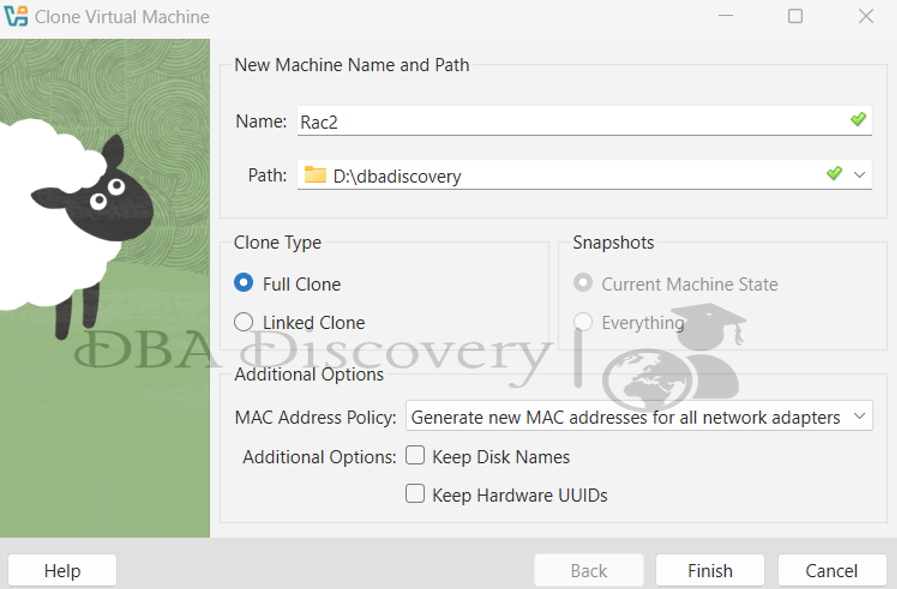
After configuring these settings, you can proceed to Finish the cloning process.
Once the cloning is complete, start both VMs. To change the hostname of the newly cloned VM, use the command.
hostnamectl set-hostname discoveryrac2
After updating the hostname, enter su and press Enter to switch to the superuser, allowing you to perform system updates or make additional configuration changes as needed
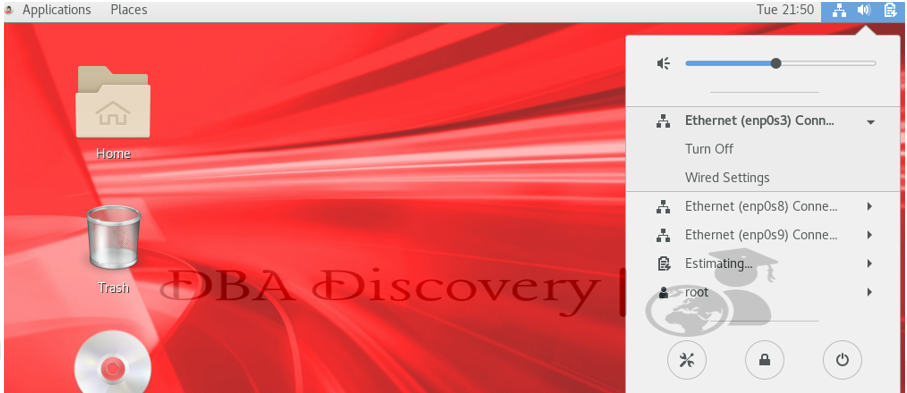
To change the IP address, click on Settings and select Wired settings. This will allow you to configure the network settings, including the IP address for the VM.
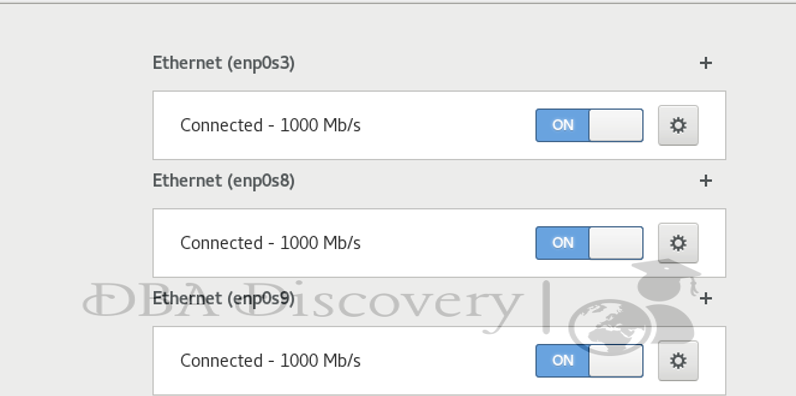
Click on Settings, then navigate to IPv4. Select the IPv4 Method as Manual and enter the desired IP address. This will configure your network settings accordingly
1)Public IP Address
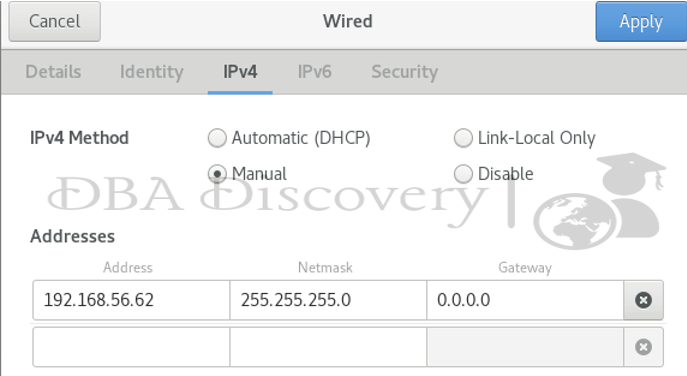
2.Privet IP Address
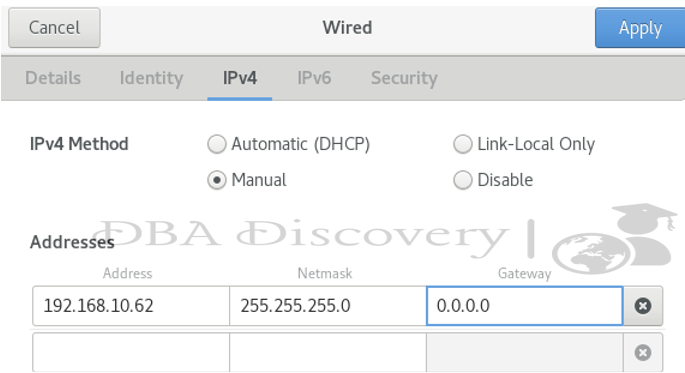
Click on Apply to save your changes. Then, to attach the shared disk, shut down both VM 1 and VM 2 to ensure a safe configuration process.
Click on Storage, select the controller, and then choose the option to add four new hard disks. Follow the prompts to configure the new hard disks for your VMs
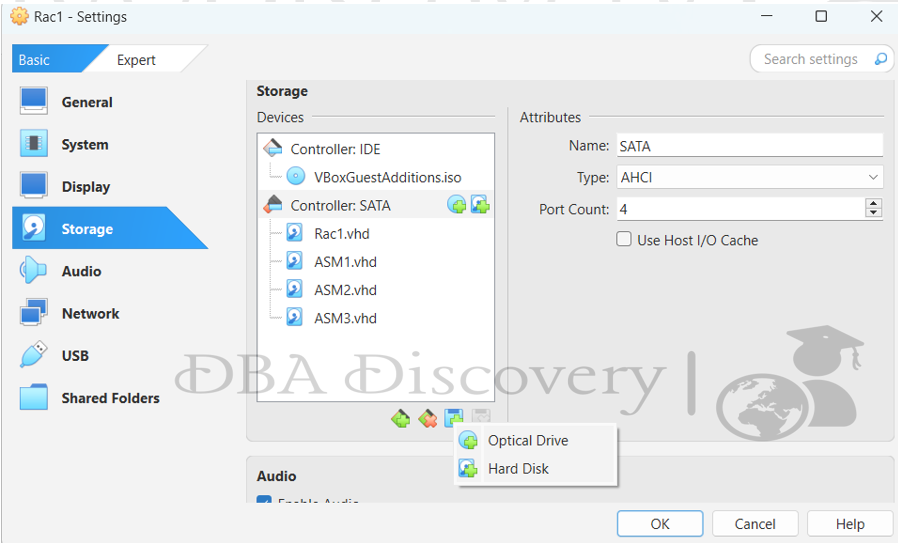
Click on Create to initiate the process of adding the new hard disk
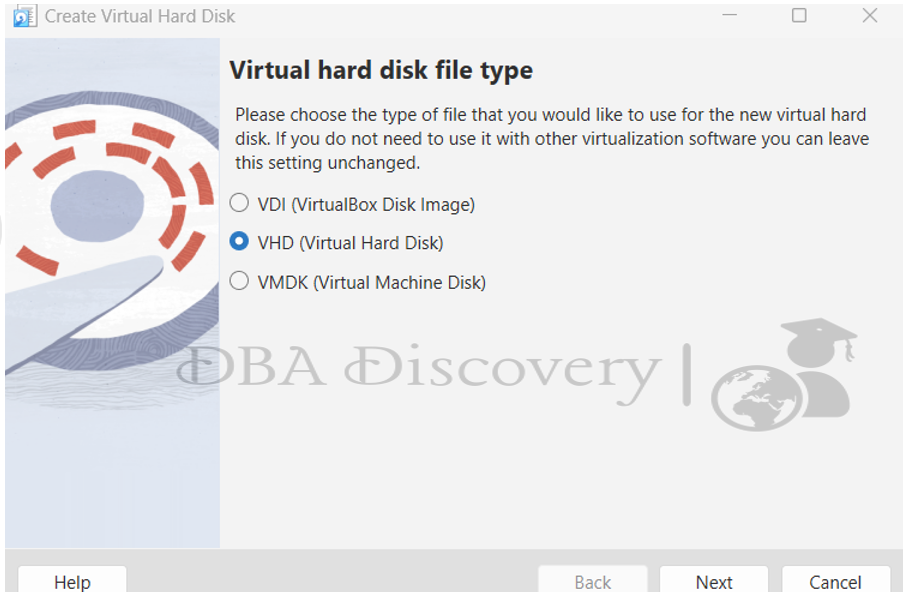
Select VHD as the disk format and then press Next to proceed with the configuration of the new hard disk.
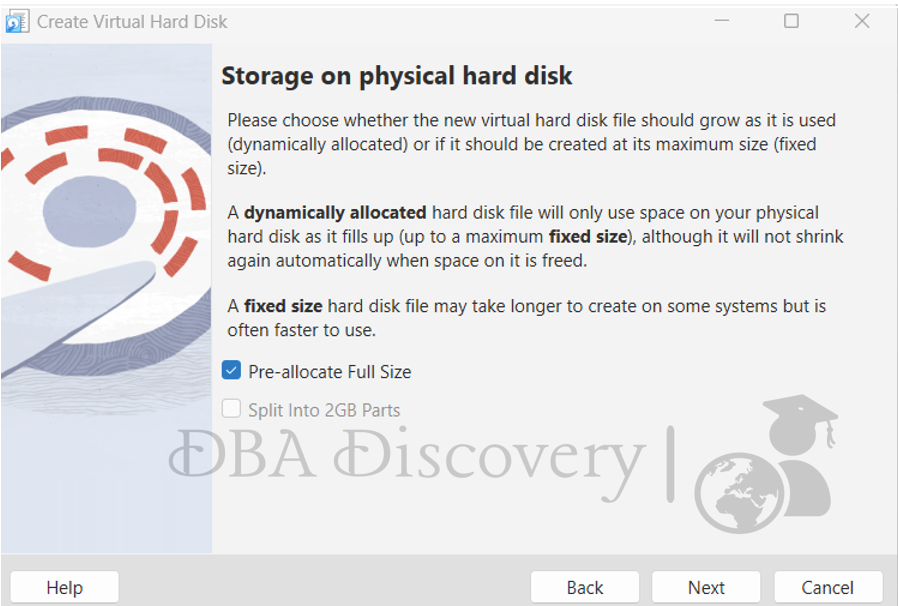
Select Pre-allocate full size for the disk allocation method, then press Next to continue with the setup.
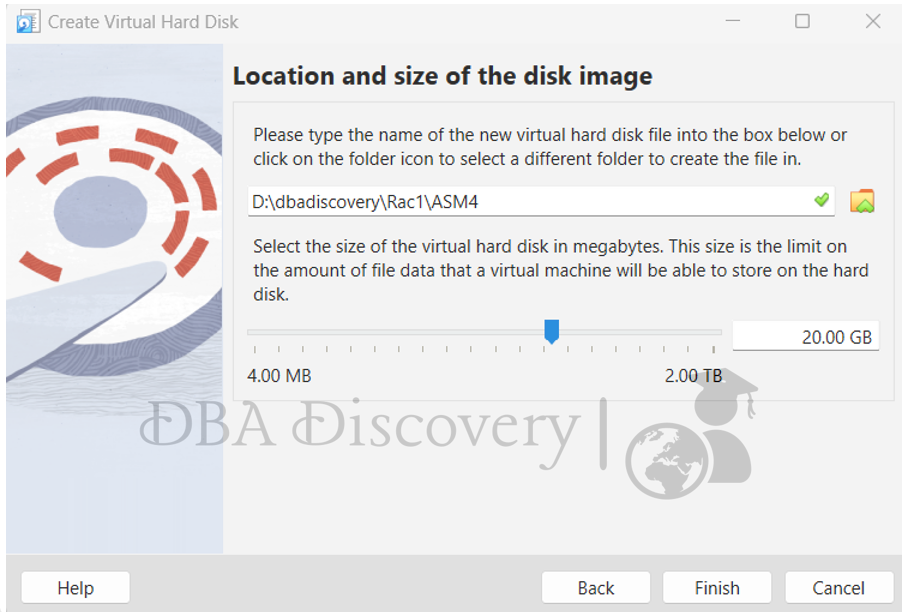
Select the desired size for the hard disk and specify the path where it will be stored. Once you’ve made your selections, click on Finish to complete the process of adding the new hard disk. Repeat this process for the other three disks
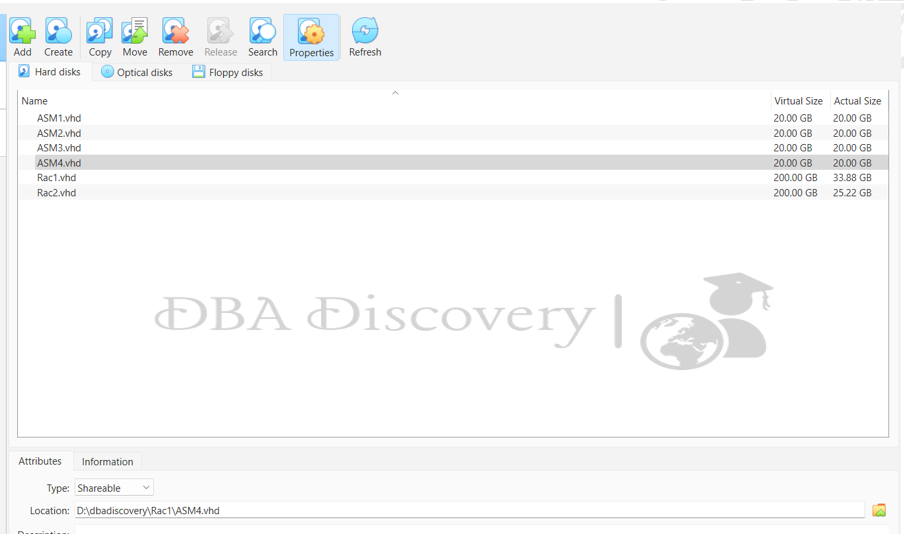
The disk has been created, but it currently reflects as Not Attached. Before attaching the disk, press Cancel, as it needs to be configured as shared first to enable proper access for both VMs
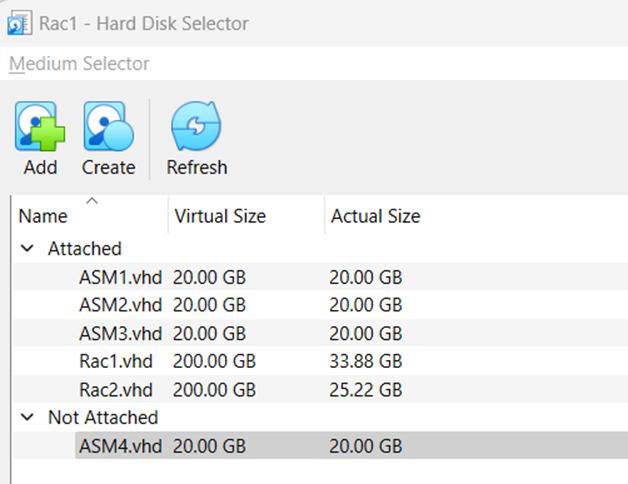
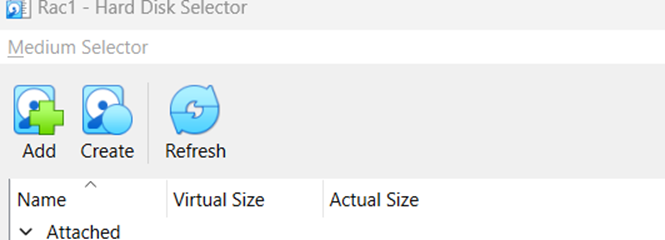
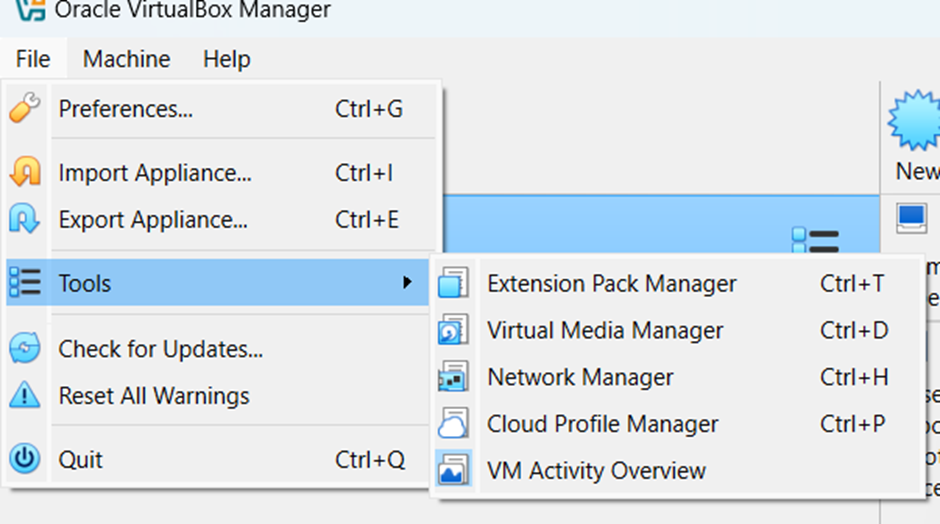
Click on File and select Virtual Media Manager. This will allow you to manage the virtual disks and their settings.
select the newly created disk and change its type to Shareable. This will enable the disk to be accessed by multiple VMs.
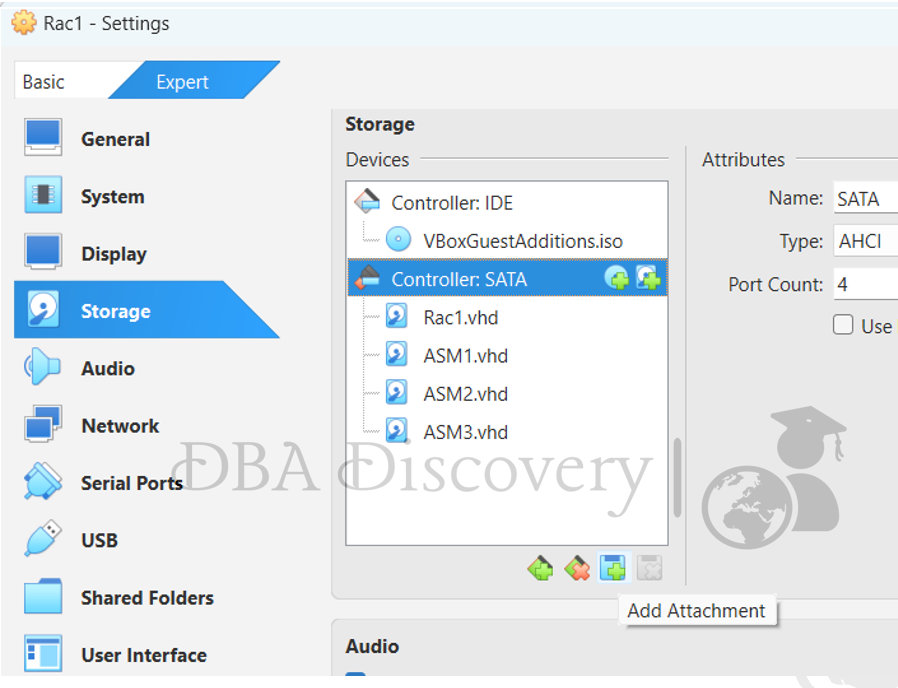
Click on Storage, then go to the controller and click Add Attachment the disk.
Select the disk you want to attach, then click on Choose to finalize the attachment to the VM.
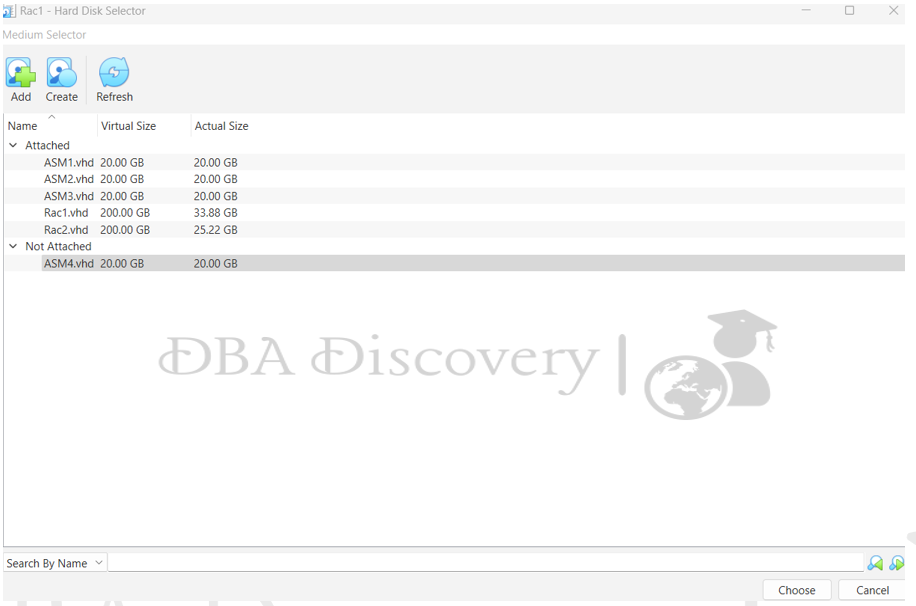
Repeat the process for each disk by selecting it and clicking on Choose to attach it. Make sure to add all disks to both VM 1 and VM 2 to ensure they have access to the shared storage.
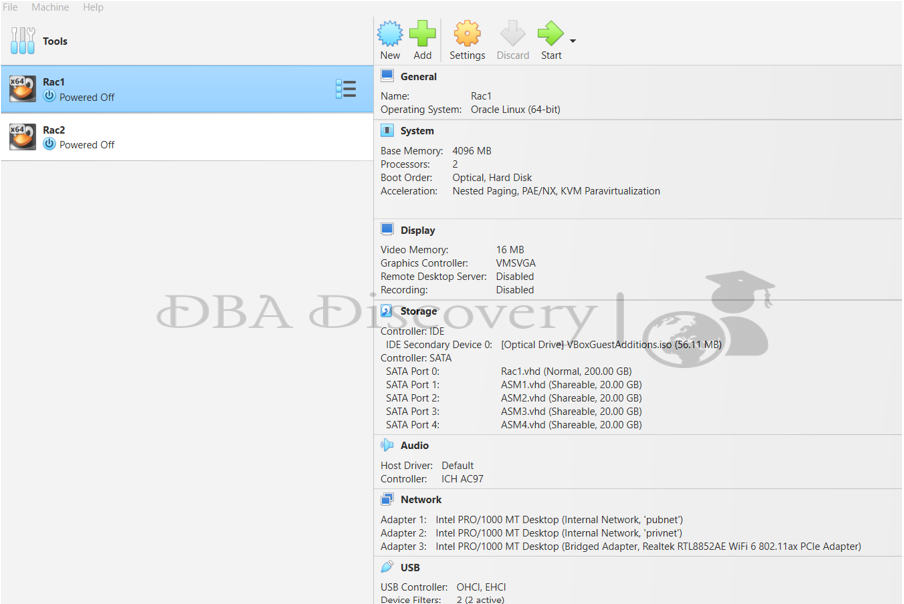
Now both VMs display similarly as shown below.
RAC 1
RAC 2
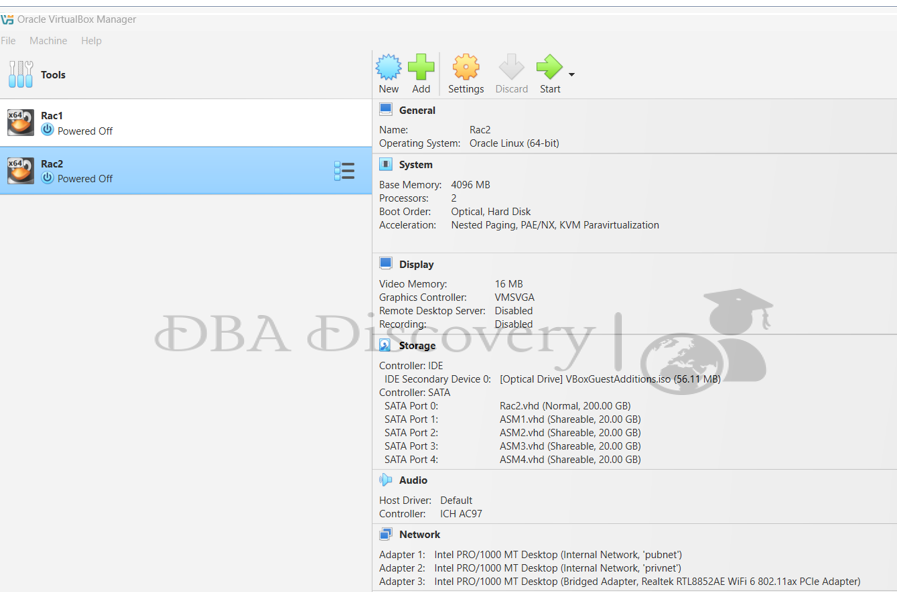
Once you have reviewed the configurations of both VMs, proceed to start both virtual machines: RAC 1 and RAC 2
Disk Partitioning
Start both VMs to begin the disk partitioning process. Once they are running, you can check the disks using the command lsblk. You should see the disks listed, for example, as sdb, sdc, sdd, and sde. This will allow you to identify the disks you want to partition
Example of Disk Partitioning
To partition the disk, use the following commands:
fdisk /dev/sde
Welcome to fdisk (util-linux 2.23.2).
Changes will remain in memory only, until you decide to write them.
Be careful before using the write command.
Device does not contain a recognized partition table
Building a new DOS disklabel with disk identifier 0x50231075.
Command (m for help): n
Partition type:
p primary (0 primary, 0 extended, 4 free)
e extended
Select (default p): p
Partition number (1-4, default 1): 1
First sector (2048-41943039, default 2048):
Using default value 2048
Last sector, +sectors or +size{K,M,G} (2048-41943039, default 41943039):
Using default value 41943039
Partition 1 of type Linux and of size 20 GiB is set
Command (m for help): w
The partition table has been altered!
Calling ioctl() to re-read partition table.
Syncing disks.
Note:-This example shows how to create a new primary partition of size 20 GiB on the specified disk (/dev/sde). After entering the commands, remember to write the changes to the disk with the W command.
Once completed, we will proceed to configure the Oracle ASM Library Driver. Stay tuned for Part 3, where we will cover additional configurations and checks.